Protest Knitting: A basic how-to guide

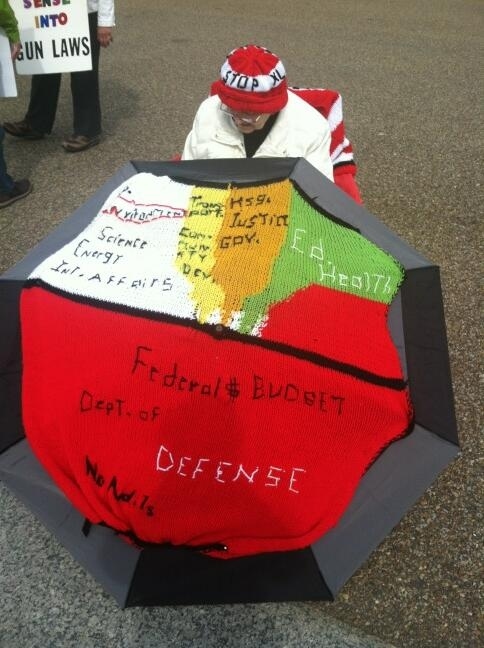
This woman's work of knitting is absolutely amazing, don't you think? She has knit a round pie chart representing the federal budget, in protest of the defense budget which - as you can see from her knitwork - takes up more than half of the federal budget. She is also sporting a slipcover on her chair which reads "OCCUPY GRANDPARENTS" and "Pay It Forward." I love this woman; she is awesome! Way to rock it!
Another political knitter is Laura Birek of the blog Nocturnal Knits and the book Picture Perfect Knits. Birek created this gorgeous version of the iconic Obama "Hope" poster as a sweater. Beautiful!
Wondering how to create your own knitted protest? Wonder no more. If you have mastered the basic knitting skills (casting on, knits, purls and casting off), you can do it.

Image courtesy Flickr/risager
1: Assess your skills and preferences
Have you tried intarsia yet? Are you willing to learn? Or have you tried intarsia and hated it? How about embroidery or other after-knitting embellishments? What techniques are you willing to use in your work? It will be well worth it in the long run to take some time to decide where you want to draw the line. If you hate intarsia, but you decide to plow forward anyway on a giant intarsia project, that's a recipe for an unfinished project right there.
There are always alternatives. Don't be afraid to ask around for advice from other knitters, either! For example, if you want to make a knitted pie chart, your first thought might be to use intarsia (which seems to be what Occupy Grandmother used). But with a bit of planning, you could knit each wedge separately and then sew them all together.
Off the top of my head, you could also knit a big circle, and use embroidery to create the lines for each wedge. You could also make a Marimekko bar chart instead (it's basically a rectangular pie chart). I'm envisioning a garter stitch color block scarf with five color blocks, representing the budget segments. A perfect beginner's project!
The point being, there are a lot of different ways to knit a cat. Don't lock yourself into a technique that you dislike.

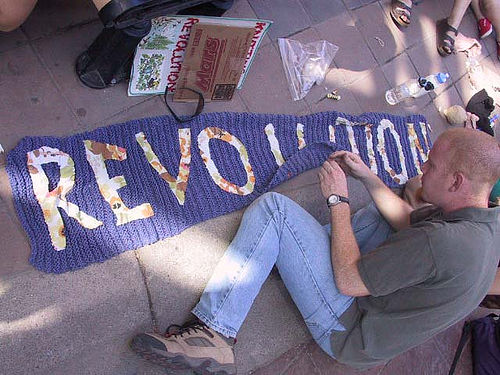
Image courtesy Flickr/Grant Neufeld
2: Practice up
If you're using a new technique, practice it first. Even if you are familiar with intarsia, you might want to make a small intarsia project as a warm-up, particularly if it has been a while. If you need to learn a new technique, learn it with a small project first. Think of it as a first draft. This may sound boring (like swatching) but it will also have a huge positive impact on the success of your finished project (like swatching).
Don't set yourself at your main project AND learn a new technique at the same time. The odds are good that if you do this, you won't be satisfied with the results.

Image courtesy Flickr/Grant Neufeld
3: Figure out how
If you will be doing intarsia, be sure to use graph paper designed for knitters. This is probably the biggest problem I see with custom intarsia projects. Because the knit stitch is rectangular, if your design looks right on regular graph paper, it will look distorted when you knit it, and then you will be sad.
The step-by-step advice on how to knit a QR code applies here as well. You will probably need to do some math once you decide what size you want your work to be, and what your gauge is. This isn't difficult, but it can take a bit of time to fiddle with the numbers until you get it right.
If you're not sure how to do what you want, ask for help! Knitters love to help. You can ask at a local yarn store, or post a question on the Ravelry forums. And don't forget YouTube for learning new techniques.

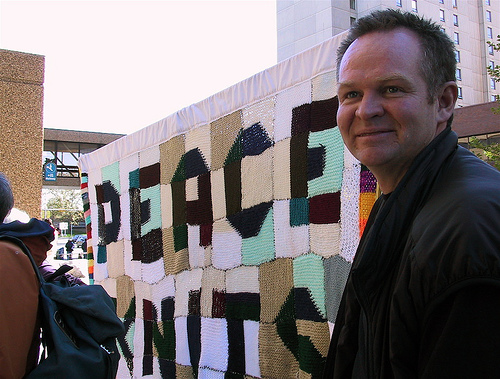
Image courtesy Flickr/Shira Golding
4: Finish it right
A lot of people are going to be seeing your finished piece - be sure it really shines! This is the time to take special care, go the extra mile and be as finicky as you can.
Wash and block your project properly, even if it's in acrylic yarn (but especially if it's in wool). Blocking will even out the stitches and seams and help sort out all your stitches to give it that finished look.
Weave in all of your ends correctly, don't just let them dangle. If you're doing embroidery, take the time to get it right - and if it's not right, have the fearlessness and strength of your convictions to rip it out and do it again. It matters!
Main image courtesy @jbendery

0 comments