Blocking your knitting: Choosing the right method

Following up on my post about which detergent to use when washing your knitting, let's explore the various permutations of blocking methods, from gentlest to most severe. For a lot of projects, it frankly doesn't really matter which method you choose. But for some projects, the right blocking method can make a huge difference in your final results.
1. A quick mist and pat it into place
For this blocking method, you just give your work a little bit of water (be it a quick dunk in the sink or a few squirts from a misting bottle) and lay it out to dry.
Works best for: Delicate projects that don't need an actual wash, or those that are already pretty close to their final shape anyway.
Works best with: Acrylic yarn.
Comments: Frankly, I never use this method. Even if I'm just making an acrylic hat or a cotton dishcloth, I always give it a full wash with soap once I have finished knitting it. There is the very real possibility that the yarn has machine oils left from its processing, or will leak dye in its first wash. I also have a now-irrational fear left over from the days when I was a smoker, that my hands will have transferred smells to the project while I was knitting it. And then again, sometimes yarns can go a bit stale and whiffy in the stash.
It also seems a bit pointless. If you're going to do so little to block your item, why bother blocking it in the first place? Maybe it's fine just the way it is.

Image courtesy Flickr/WoofBC
2. Just a light steaming
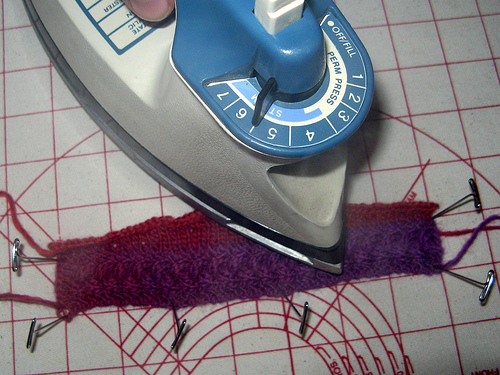
This method uses a steam iron and a gentle touch. Lay the item out on a towel and hit it with blasts of steam, being sure to hold the iron several inches away. You're not ironing your item per se; you're just using the iron to deliver hot moisture.
Works best for: Projects that need a little bit of help getting into place, but don't need a full washing. Also good for projects that need to dry fast because you ran up to (or over) your knitting deadline.
Works best with: Wool and cotton. (Acrylic yarn can melt if you're not careful; this is known as "killing" the yarn.)
Comments: I have used this method to re-block something if it didn't dry quite to shape from the initial blocking, or to add a finishing touch before sending something out the door.

Image courtesy Flickr/normanack
3. Soak and "natural" block (a.k.a. "wet blocking")
This method essentially copies the way the item will be washed in the future. For wool and other natural fibers, give it a good soak in tepid water, roll it in a towel and gently squeeze to remove excess water, then lay it out flat, shape it by hand, and let it dry all on its own. For cotton and acrylic yarn, run them through the laundry.
Works best for: Any project that doesn't require drastic re-shaping.
Works best on: Any fiber.
Comments: This is the method I almost always use, for almost all projects. Not least because you can learn a lot about your item, and you may learn something horrible. Better for you to learn these things now, than for your recipient to discover them later. I have had projects bleed copious amounts of dye, shrink horribly in the wash, or sag to twice their original size.
Conceptually speaking, I also feel this is the most sound method of blocking. If you cannot attain the shape you want by this method (except for lace, a special case), then you have deluded yourself. Trying to block something too dramatically is almost always doomed to failure, because the work will slowly but inexorably return to its original shape.

Image courtesy Flickr/weekendknitter
4: A soak and a stern pinning-out
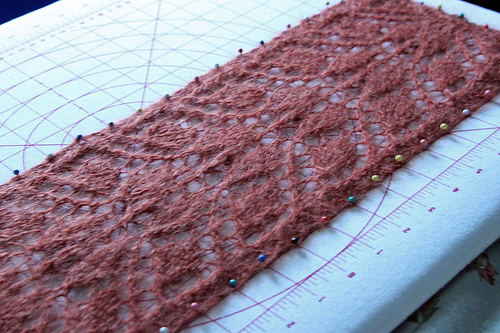
This method starts with the same soak-and-wash as method #3. But instead of laying it out to dry, you pin the item out on a tensioned surface, whether it's a bedspread or a collection of foam pads.
Works best for: Lace, which almost always has to be blocked this way in order to achieve the correct final result.
Works best on: Wool, silk, and other natural fibers.
Comments: Be sure to invest in rust-proof pins for this project, lest your beautiful heirloom-quality lace shawl end up with grody rust marks from the wet pins.
Main image courtesy Flickr/quinn.anya

0 comments